前言
为了加快编译速度,在工程拆分后,将一些常用库进行二进制化,工程引用库后不需要对源码进行编译。
本文内容适合工程需要二进制化并使用过CocoaPods的朋友,工程的依赖管理可以查看这篇:谈谈iOS多工程依赖
方案
发现总结的方案有以下几种
- 分仓库管理
podspec宏管理prepare_command+Carthage/cocoapods packager/python/ruby
分仓库管理
创建了一个公用SDK仓库,专门放生成的Framework,spec文件内使用subspecs区分各个Framework。
公用SDK仓库目录结构
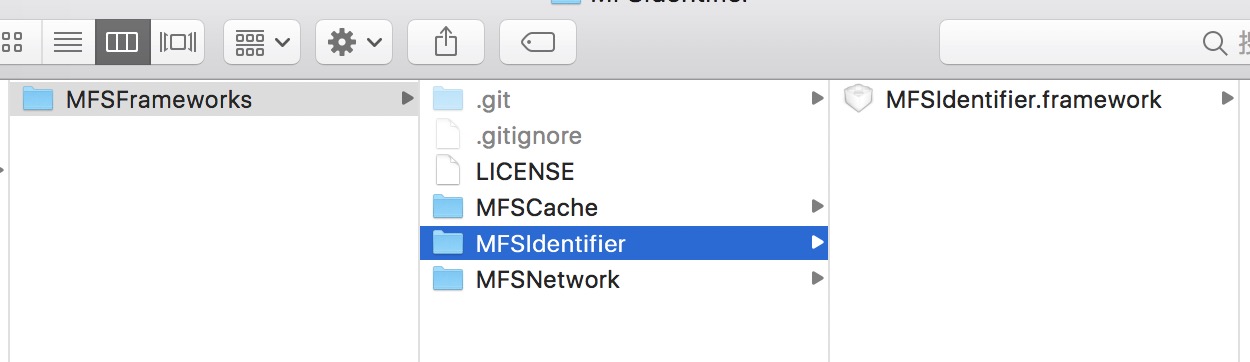
公用SDK仓库spec统一管理
{
  "name": "MFSFrameworks",
  "version": "x.x.x",
  "summary": "MFSFrameworks Test",
  "description": "所有使用到的SDK集合, subspecs内容纯属模拟",
  "homepage": "http://imfong.com",
  "license": "MIT",
  "authors": {
    "maxfong": "devmaxfong@qq.com"
  },
  "platforms": {
    "ios": "6.0"
  },
  "source": {
    "git": "git仓库地址",
    "tag": "x.x.x"
  },
  "libraries": "xml2",
  "requires_arc": true,
  "subspecs": [
    {
      "name": "MFSCache",
      "resources": "MFSCache/*.bundle",
      "vendored_frameworks": "MFSCache/*.framework",
      "vendored_libraries": "MFSCache/*.a",
      "frameworks": "SystemConfiguration"
    },
    {
      "name": "MFSNetwork",
      "source_files": "MFSNetwork/*.{h,m}",
      "vendored_frameworks": "MFSNetwork/*.framework",
      "frameworks": [
        "AVFoundation"
      ],
      "libraries": [
        "z",
        "c++"
      ]
    },
    {
      "name": "MFSIdentifier",
      "source_files": "MFSIdentifier/**/*.{h}",
      "vendored_frameworks": "MFSIdentifier/*.framework",
      "frameworks": [
        "AdSupport"
      ],
      "dependencies": {
        "MFSCache": [
        ]
      }
    }
  ]
}
使用方式
pod 'MFSFrameworks', 'x.x.x',
    :subspecs => ['MFSNetwork', 'MFSCache', 'MFSIdentifier']
假设MFSIdentifier需要源码调试,podfile修改为
pod 'MFSFrameworks', 'x.x.x',
    :subspecs => ['MFSNetwork', 'MFSCache']
pod 'MFSIdentifier', 'x.x.x'
缺点
- 需要额外维护一个公用SDK仓库
- 维护2个spec,源码仓库也需要升级
- 每次功能改动,需要打包并提交到公用SDK仓库
podspec宏管理
比对上一种方案,不需要创建公用SDK仓库,只需要维护源码仓库,将生成的Framework直接提交在源码仓库。
使用MFSIdentifier举例
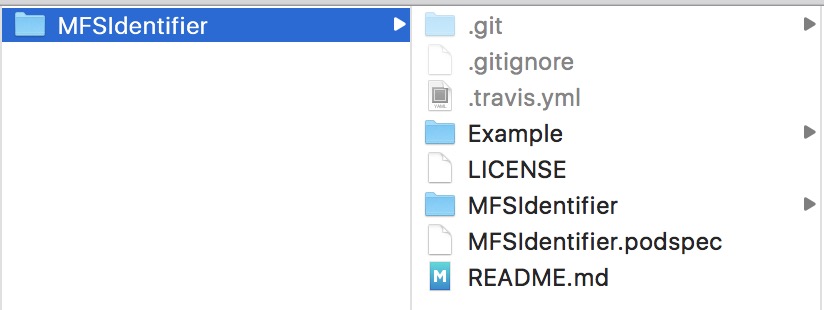
podspec
使用pod lib create MFSIdentifier创建工程,会自动生成MFSIdentifier.podspec
可使用命令转换成json文件
pod ipc spec MFSIdentifier.podspec » MFSIdentifier.podspec.json
podspec内是支持if、else语法的
Pod::Spec.new do |s|
  s.name             = 'MFSIdentifier'
  s.version          = '1.0.0'
  s.summary          = 'iOS App DeviceId'
  s.description      = <<-DESC
  iOS App唯一标识符获取方案
                       DESC

  s.homepage         = 'https://github.com/maxfong/MFSIdentifier'

  s.license          = { :type => 'MIT', :file => 'LICENSE' }
  s.author           = { 'maxfong' => 'devmaxfong@qq.com' }
  s.source           = { :git => 'https://github.com/maxfong/MFSIdentifier.git', :tag => s.version.to_s }
  s.ios.deployment_target = '8.0'

  if ENV['IS_SOURCE']
    s.source_files = [
      'MFSIdentifier/*.{h,m}',
      'MFSIdentifier/**/*.{h,m}'
    ]
  else
    s.source_files = 'SDK/**/*.{h}'
    s.ios.vendored_frameworks = 'SDK/*.framework'
  end

  s.dependency 'MFSCache'
  s.xcconfig = {
    'OTHER_LDFLAGS' => '-ObjC'
  }
end
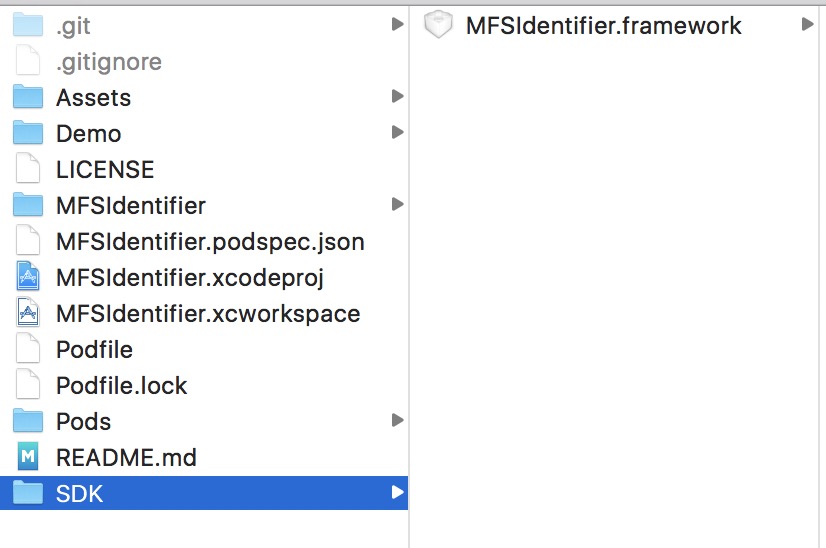
仓库目录
提前将二进制文件编译好放在工程仓库的SDK目录内
使用方式
正常使用
pod install
源码调试
IS_SOURCE=1 pod install
缺点
- 只支持私有源库,共有库提交后会变成
podspec.json,不再支持if判断 - 每次修改代码需打包新Framework,可能遗漏
- 调试模式和正常使用切换需要清理Pod缓存
清理缓存
- 命令
pod cache clean MFSIdentifier或删除/Users/[用户名]/Library/Caches/CocoaPods/Pods/Release/MFSIdentifier目录 - 移除工程中
Pods/MFSIdentifier文件夹
prepare_command + Carthage/cocoapods packager/python/ruby
Carthage
Carthage是一款去中心化的依赖管理器,只需要工程配置好,即可编译
//github
github "maxfong/MFSIdentifier" >= 1.0.0
//自定义git仓库
git "https://github.com/maxfong/MFSIdentifier.git"  >= 1.0.0
//本地目录
carthage build --no-skip-current
配置Carthage时需选择Manager Schemes并对需要编译的Target勾选Shared,否则会出现提示
Dependency "项目名" has no shared framework schemes
是因为Carthage编译基于xcodebuild,-workspace编译时需要-scheme参数
而我们配置.gitignore中排除了xcuserdata
git下载的工程(或删掉xcuserdata)后运行xcodebuild -list可以发现不存在Schemes一项
勾选Shared后会在.xcodeproj创建xcshareddata目录,里面保存着.xcscheme
局限性
- 打成的动态Framework需要添加到工程
Embeddd Binaries中,打包后的app内包含framework文件,影响包大小。 - 使用Carthage生成的Framework,包含完整的类实现,如果依赖库过多影响整体包大小。
区分架构打包后需要通过脚本控制设备和模拟器的库引用比较麻烦
cocoapods packager
安装
sudo gem install cocoapods-packager
局限性
不用的原因同Carthage,依赖过多会引起类冲突
cocoapods-packager
cocoapods打包
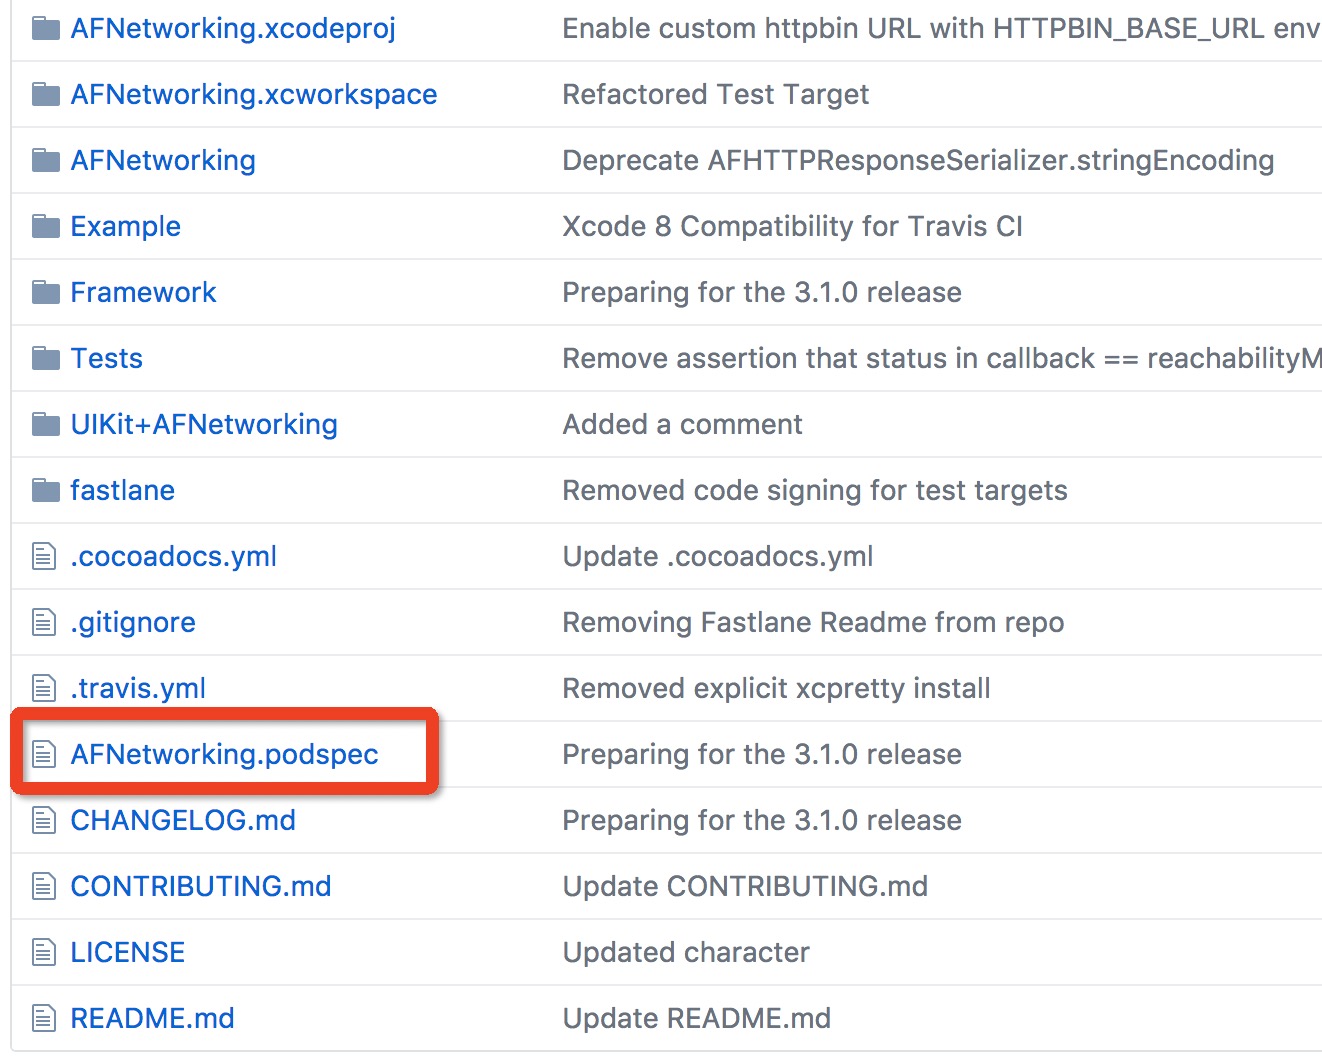
开源项目将podspec文件也放在仓库中,是为了支持cocoapods packager
Shell
工程原来使用的编译脚本就是shell,正好可以使用起来
# 更新CocoaPods
#pod update

# 填写Framework的Target名称
FMK_NAME=Target名称
WORKSPACE_NAME=${FMK_NAME}
SCHEME_NAME=${FMK_NAME}
# Install dir will be the final output to the framework.
# The following line create it in the root folder of the current project.
INSTALL_DIR=Products/${FMK_NAME}.framework
# Working dir will be deleted after the framework creation.
WRK_DIR=build
DEVICE_DIR=${WRK_DIR}/Release-iphoneos/${FMK_NAME}.framework
SIMULATOR_DIR=${WRK_DIR}/Release-iphonesimulator/${FMK_NAME}.framework
# project方式
# xcodebuild -configuration "Release" -target "${FMK_NAME}" -sdk iphoneos clean build
# xcodebuild -configuration "Release" -target "${FMK_NAME}" -sdk iphonesimulator clean build
# workspace方式
xcodebuild -workspace ${WORKSPACE_NAME}".xcworkspace" -configuration "Release" -scheme ${SCHEME_NAME} SYMROOT=$(PWD)/build -sdk iphoneos clean build
xcodebuild -workspace ${WORKSPACE_NAME}".xcworkspace" -configuration "Release" -scheme ${SCHEME_NAME} SYMROOT=$(PWD)/build -sdk iphonesimulator clean build
# Cleaning the oldest.
if [ -d "${INSTALL_DIR}" ]
then
rm -rf "${INSTALL_DIR}"
fi
mkdir -p "${INSTALL_DIR}"
cp -R "${DEVICE_DIR}/" "${INSTALL_DIR}/"
# Uses the Lipo Tool to merge both binary files (i386 + armv6/armv7) into one Universal final product.
lipo -create "${DEVICE_DIR}/${FMK_NAME}" "${SIMULATOR_DIR}/${FMK_NAME}" -output "${INSTALL_DIR}/${FMK_NAME}"
rm -r "${WRK_DIR}"
使用这段脚本打出的Framework,不包含引用类,多个framework需相互依赖才可使用。
prepare_command
通过prepare_command 使Pod支持bash script。
CocoaPods prepare_command
使得我们提前执行设定的script,podspec文件改为:
{
  "name": "MFSIdentifier",
  "version": "1.0.0",
  "summary": "iOS App DeviceId",
  "description": "iOS App唯一标识符获取方案",
  "homepage": "https://github.com/maxfong/MFSIdentifier",
  "license": "MIT",
  "authors": {
    "maxfong": "devmaxfong@qq.com"
  },
  "platforms": {
    "ios": "8.0"
  },
  "source": {
    "git": "https://github.com/maxfong/MFSIdentifier.git",
    "tag": "1.0.0"
  },
  "dependencies": {
    "MFSCache": [ ]
  },
  "xcconfig" : {
    "OTHER_LDFLAGS" : "-ObjC"
  },
  "vendored_frameworks": "设定好的编译目录/*.framework",
  "prepare_command": "/usr/bin/python build_framework.py"
  //或
  // "prepare_command": "/usr/bin/ruby build_framework.rb"
  //或
  // "prepare_command": "/bin/sh pod package MFSIdentifier.podspec.json"
  //或
  // "prepare_command": "/bin/sh carthage build --no-skip-current"
}
寻一款熟悉的语言,工程目录内添加对应的脚本文件
I have a pod, I have a carthage, En…
完整的流程
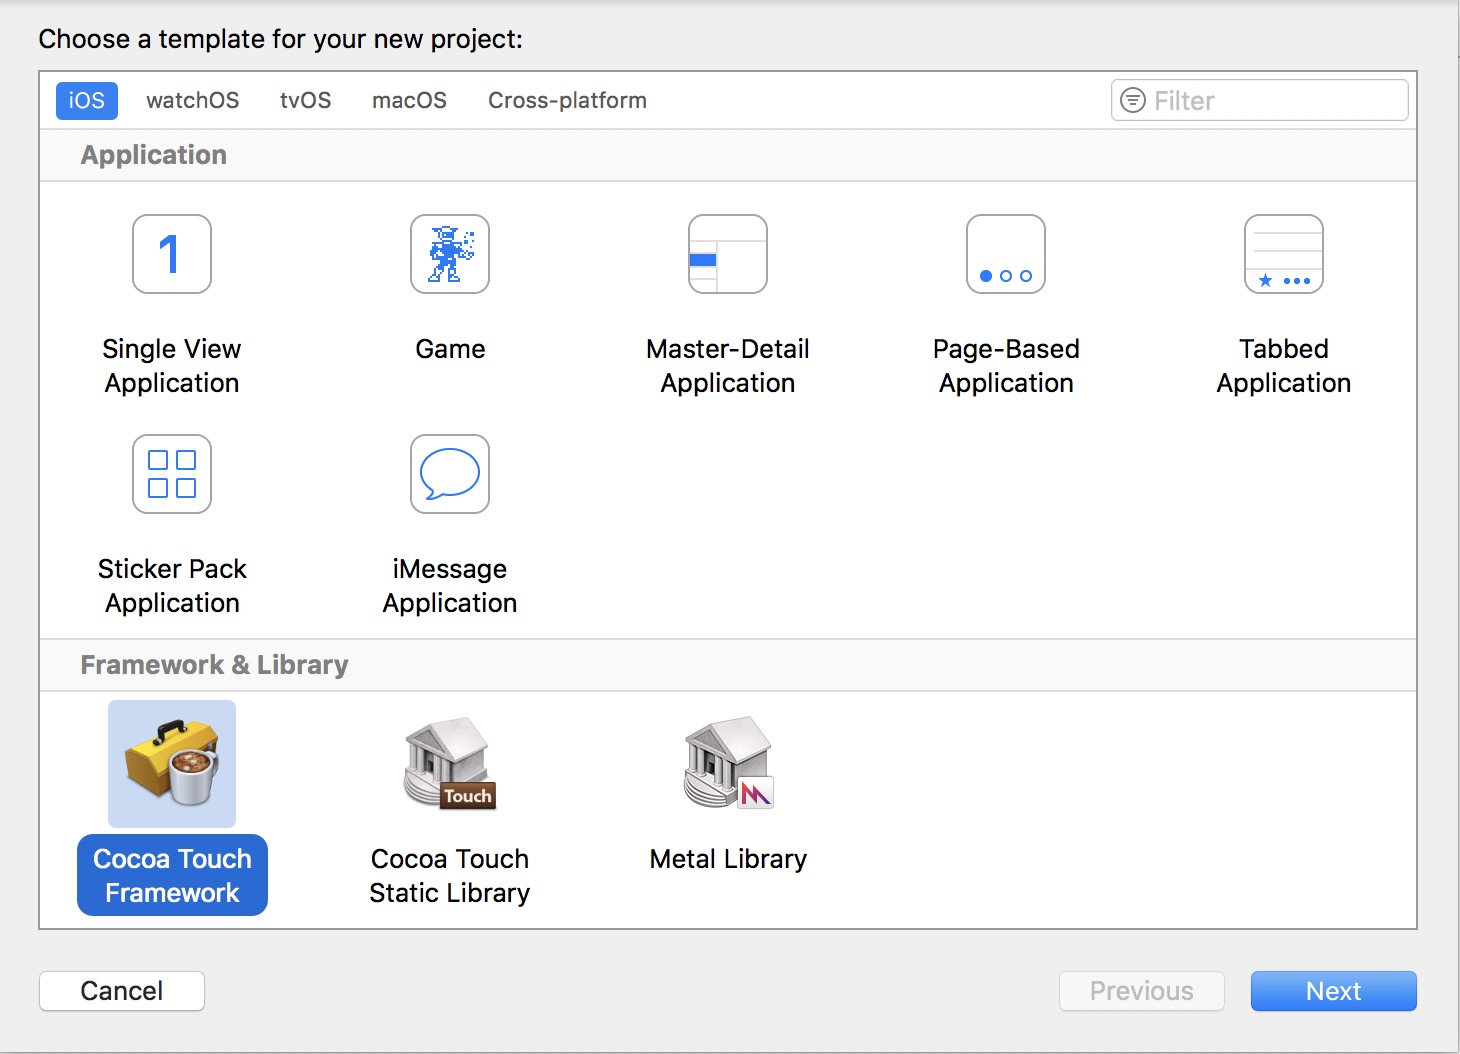
工程创建
创建Cocoa Touch Framework,命名为iOSBinaryPractice
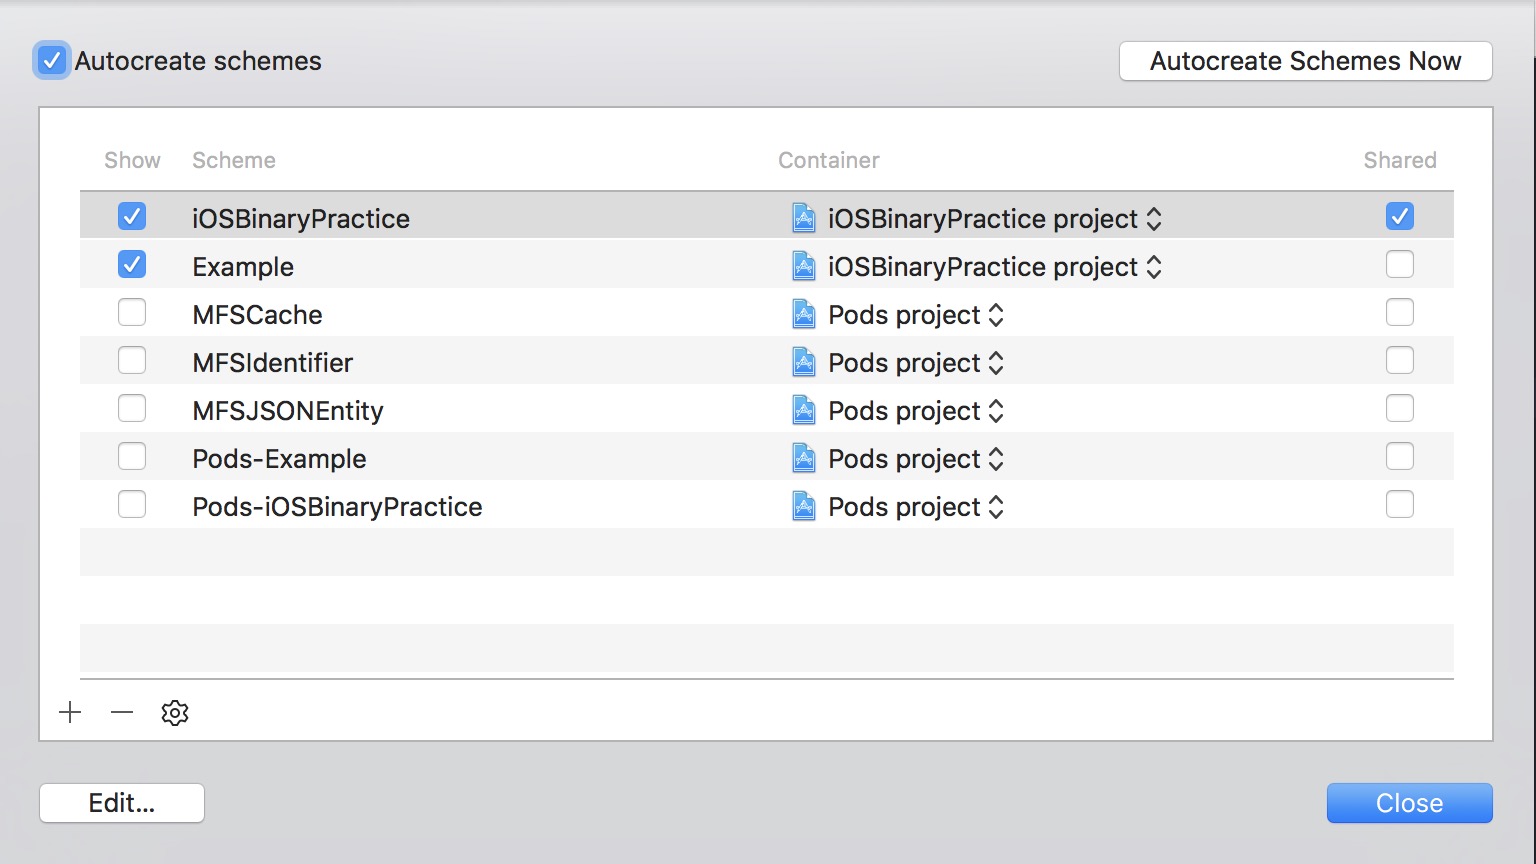
开启Shared
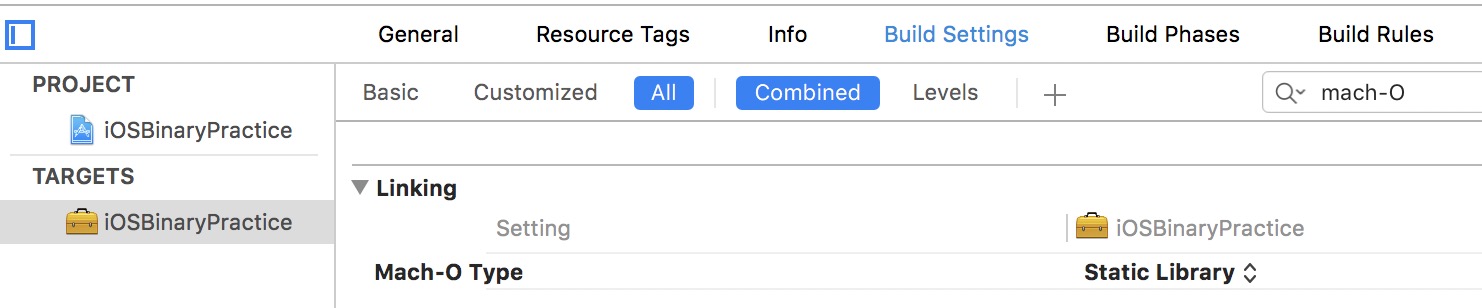
设置Mach-O为Static Library,如果工程支持动态库,则不需要修改
添加Podfile并pod update
这步是模拟支持依赖其他库,可以不需要
source 'https://github.com/CocoaPods/Specs.git'

target 'iOSBinaryPractice' do
	pod 'MFSIdentifier'
end
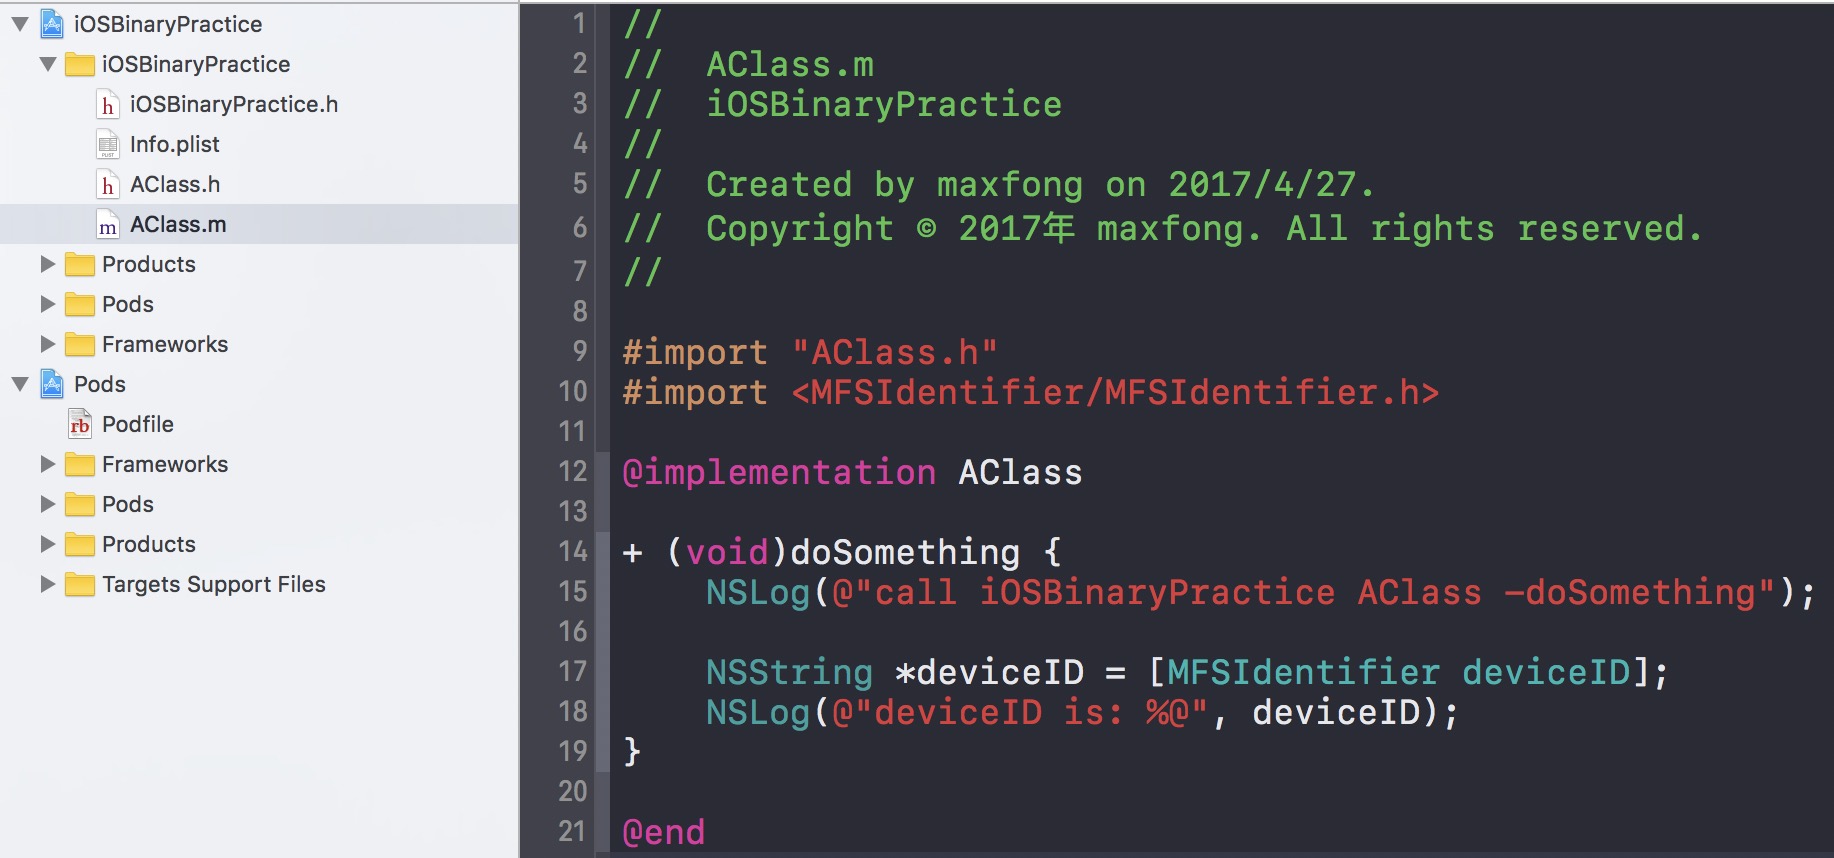
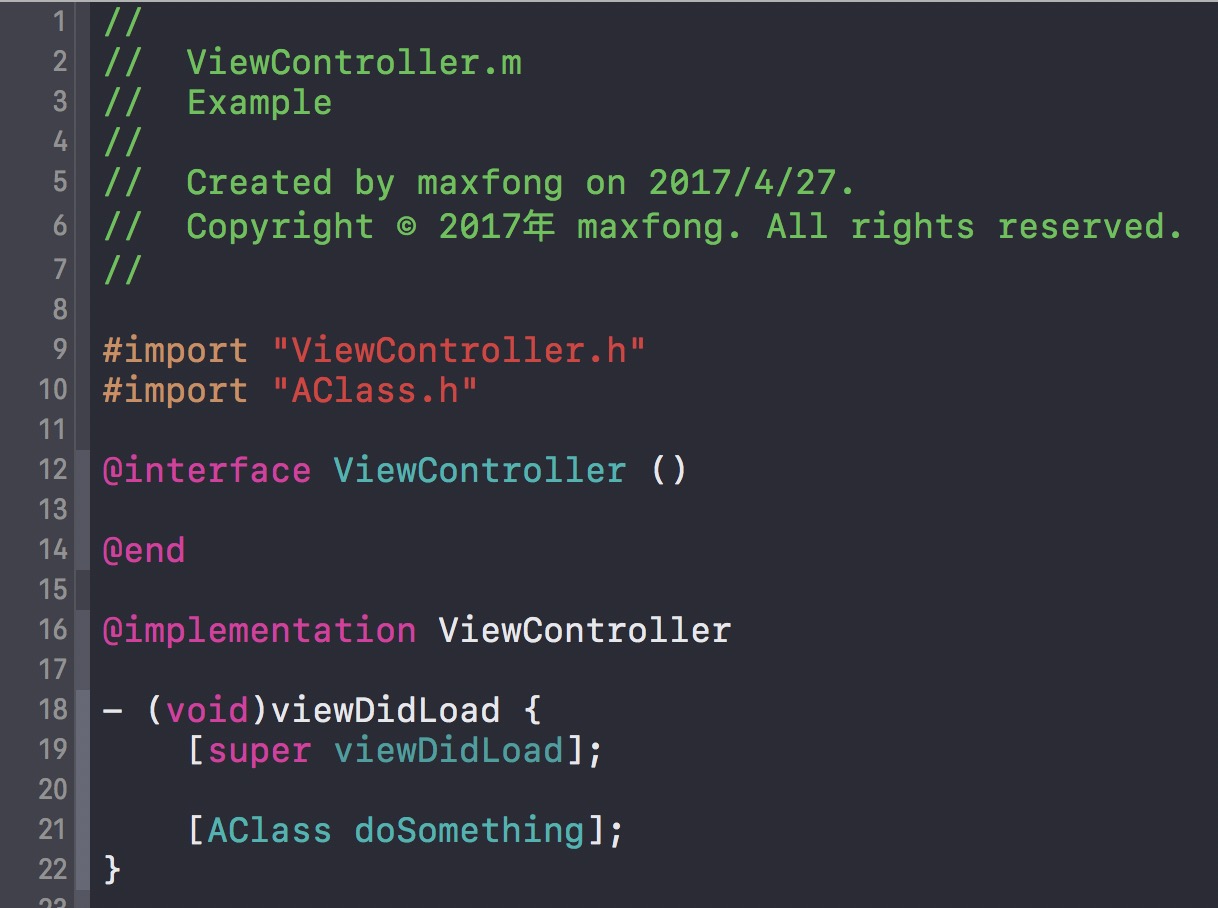
添加功能类,引用依赖MFSIdentifier
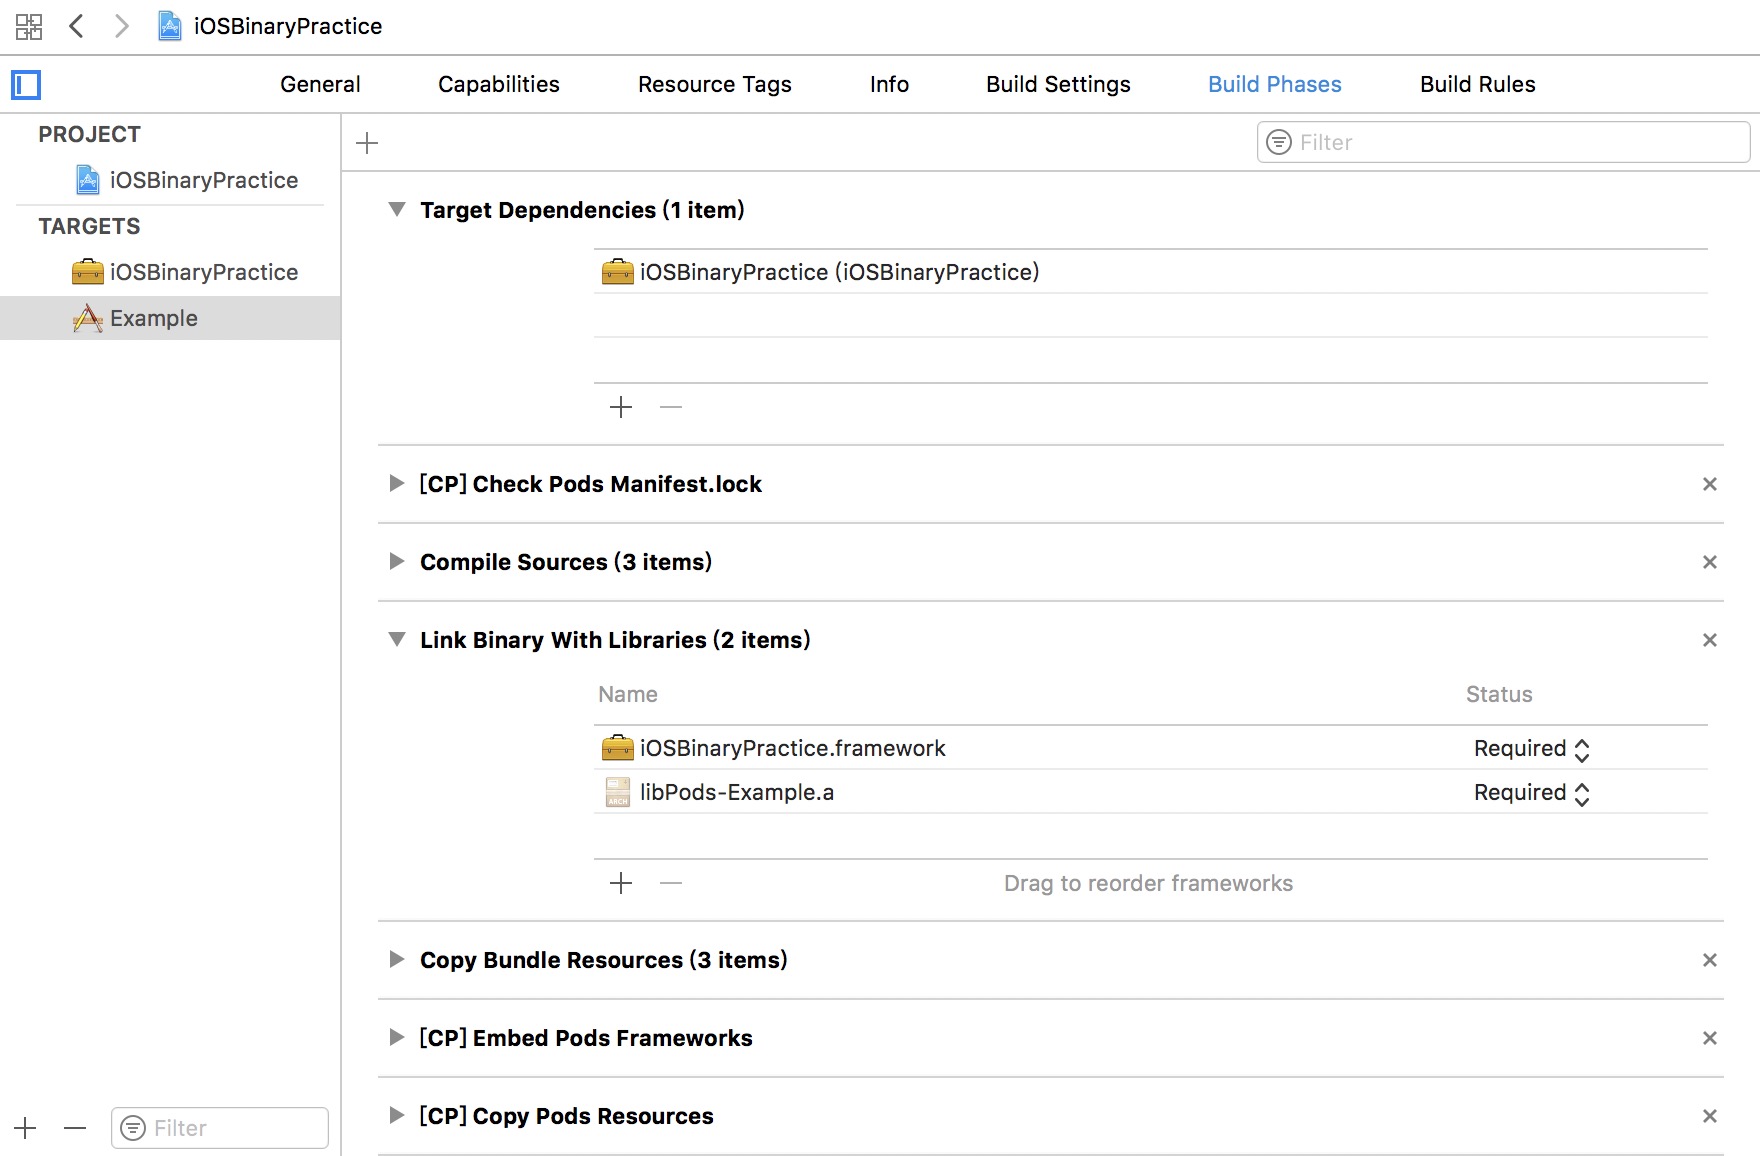
创建Example引用iOSBinaryPractice.framework
这步是测试
iOSBinaryPractice.framework能否正常使用
更新Podfile
source 'https://github.com/CocoaPods/Specs.git'

target 'iOSBinaryPractice' do
	pod 'MFSIdentifier'
end

target 'Example' do
    pod 'MFSIdentifier'
end
在Example调用,发现运行一切正常
Shell创建
工程目录创建build_framework.sh,内容为之前shell脚本
如果仓库只要pod依赖,需要开启
#pod update
FMK_NAME=Target名称需要修改,直接使用${PROJECT_NAME}会有问题
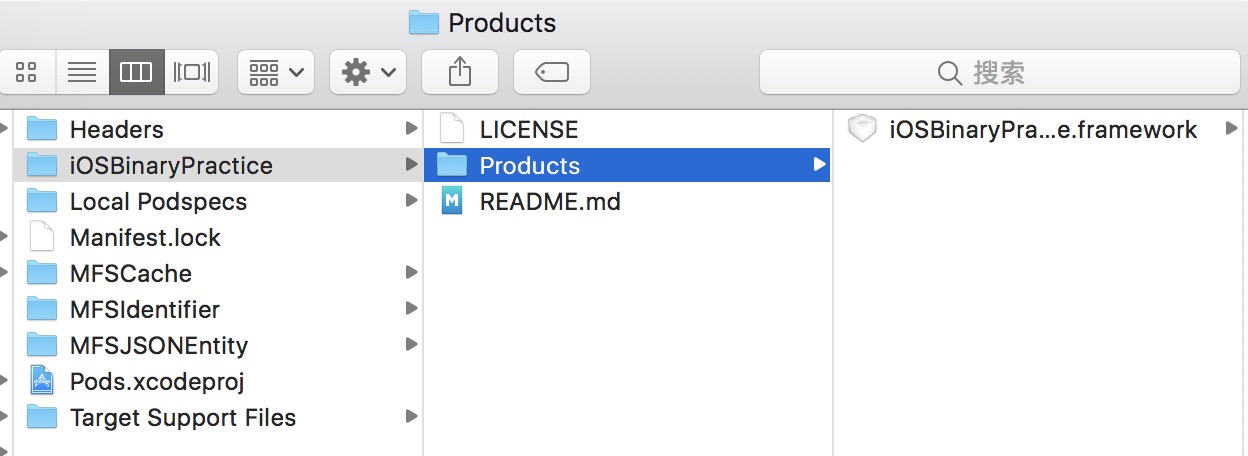
终端打开工程目录,执行sh build_framework.sh,查看是否生成了Products目录,并且iOSBinaryPractice.framework是否生成
podspec创建提交
创建podspec,测试并且提交cocoapods,最终的iOSBinaryPractice.podspec.json文件
过程省略
{
  "name": "iOSBinaryPractice",
  "version": "1.0.0",
  "summary": "iOSBinaryPractice",
  "description": "iOS 组件二进制化方案 Demo",
  "homepage": "https://github.com/maxfong/iOS-Library-Binary-Practice",
  "license": "MIT",
  "authors": {
    "maxfong": "devmaxfong@qq.com"
  },
  "platforms": {
    "ios": "7.0"
  },
  "source": {
    "git": "https://github.com/maxfong/iOS-Library-Binary-Practice.git",
    "tag": "1.0.0"
  },
  "source_files": "Products/**/*.{h}",
  "vendored_frameworks": "Products/*.framework",
  "dependencies": {
    "MFSIdentifier": [
    ]
  },
  "prepare_command": "/bin/sh build_framework.sh"
}
使用方式
在podfile中引用
pod 'iOSBinaryPractice', '1.0.0'
Installing iOSBinaryPractice 1.0.0过程时间会长一点,是在编译
完成后查看Pods目录文件结构
调试问题
二进制化后的提高了工程编译速度,但是不可以调试,所以我们需要支持源码调试模式
创建0.1.alpha标签,规定0.1.alpha为调试版本,podspec内容
很难命名,这边就叫
0.1.alpha,想直接定义为debug标签,但是CocoaPods不允许
1.标签排在第一位,一般不会被使用到
2.很难被重复定义
{
  "name": "iOSBinaryPractice",
  "version": "0.1.alpha",
  "summary": "iOSBinaryPractice",
  "description": "iOS 组件二进制化方案 Demo",
  "homepage": "https://github.com/maxfong/iOS-Library-Binary-Practice",
  "license": "MIT",
  "authors": {
    "maxfong": "devmaxfong@qq.com"
  },
  "platforms": {
    "ios": "7.0"
  },
  "source": {
    "git": "https://github.com/maxfong/iOS-Library-Binary-Practice.git",
    "tag": "0.1.alpha"
  },
  "source_files": [
    "iOSBinaryPractice/*.{h,m}"
  ],
  "dependencies": {
    "MFSIdentifier": [
    ]
  }
}
源码模式
在podfile中引用
pod 'iOSBinaryPractice', '0.1.alpha'
0.1.alpha标签类似一个指针,可以修改并指向代码的最新版本
如果发现源码与标签指向的不同,你可能需要做一次清理
参考文章之前的清理
完整的代码
后续
使用这种方式将Xcode的build时间提前到了pod update阶段,使得开发时效率加快。
文章的很多细节没有表达出来,如果实践有问题可以留言。